 -- Technical Tips: Improving Shade Communication
Tooth shades can be the most difficult, while at the same time most important, thing to communicate between the dental office and lab. The success of a crown and bridge case, particularly single unit cases, depends to a great degree on how closely the shade of the crown matches the shade of the adjacent teeth.
One way to improve the precision and accuracy of communicating shades is with the use of the Vita 3-D Master shade guide.
This well organized and user friendly guide not only makes sense but allows the dental clinician to choose up to 81 possible shades from 5 degrees of value (or six when using the bleach or 0 tab). In addition to a greater degree of shade possibilities, today’s porcelains are formulated in the same ways the shade guide is organized.
For example, when a technician mixes 1M1 porcelain with 2M1 porcelain, the combination results in a 1.5M1.
This organization gives us a very precise and accurate system for creating dental restorations that match their patient’s natural dentition. Let’s take a closer look and review the Vita 3D-Master shade guide.
The shade value, or the degree of light to dark, is arranged from left to right with the lighter shades on the left and the darker shades on the right. The top middle shade tab in each group is the basic shade and the starting point for determining a shade (See Figure 1). These values are labeled 1, 2, 3, 4, 5 (and 0 for bleach shades).
The 3D Master shade guide allows you to select a shade that is between two groups. For example, if the shade is between a 2M and a 3M the shade is a 2.5M and is indicated in this way on a prescription.
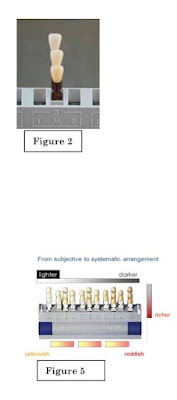
After the value of the tooth shade has been selected, the next step is to determine the shade’s chroma, or the degree of paleness or richness of the shade. As you work down a shade group bottom are very rich (See Figure 2).
As with value, the 3D Master shade guide allows you to select a chroma in-between two shade tabs. Example - The shade between a 3M1 and a 3M2 is a 3M1.5 and would be indicated on the prescription in the same way (See Figure 3).
The last step in determining a shade with the 3D guide is to check the hue of the shade. If a shade appears more red or yellow than the middle shade tab the R (red) tabs and the L (yellow) tabs are available (See Figure 4).
A shade that is slightly more yellow than a 2M2 is a 2L2, slightly redder a 2R2. Again a shade can be in-between and the tabs and indicated so on the prescription (between 3L1.5 and 3L2.5 is a 3L2).
In summary, when selecting a shade using the 3D Master shade guide begin with the value (top middle shade tabs). Then determine the intensity or richness (chroma) of the tooth shade (the tabs are arranged from pale on top to rich on bottom).
Finally, determine if the shade is yellower (L) or redder (R) when compared to the middle (M) shade if necessary (See Figure 5).
If you are a dentist with questions shade determination or about a particular esthetic dental case, please give Renstrom Dental Studio (laboratory) call so we can answer your questions!

CONTACT
Renstrom Dental Studio, Inc
Renstrom.com
Vadnais Heights/St. Paul MN
651-407-0491
Original Minnesota Lab's Shade Guide Technical Tips Article posted here.
Renstrom Dental Studio (MN Lab) is also a Northern Dental Alliance member.
Reposted by
Dick Chwalek
NicheDental.com
Dick is also a Northern Dental Alliance member.


No comments:
Post a Comment